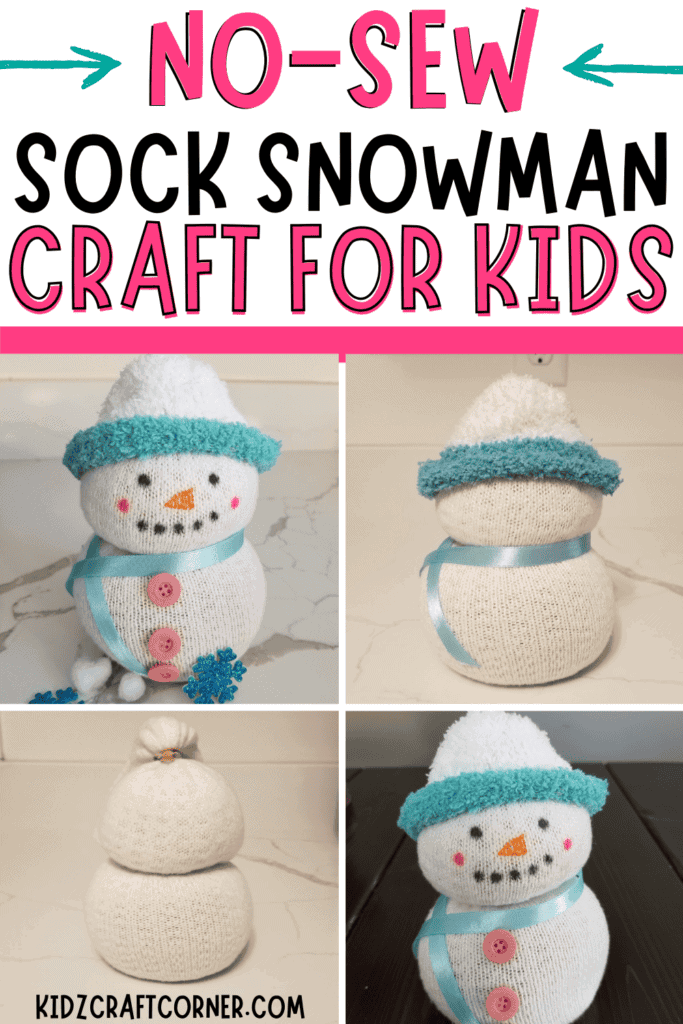
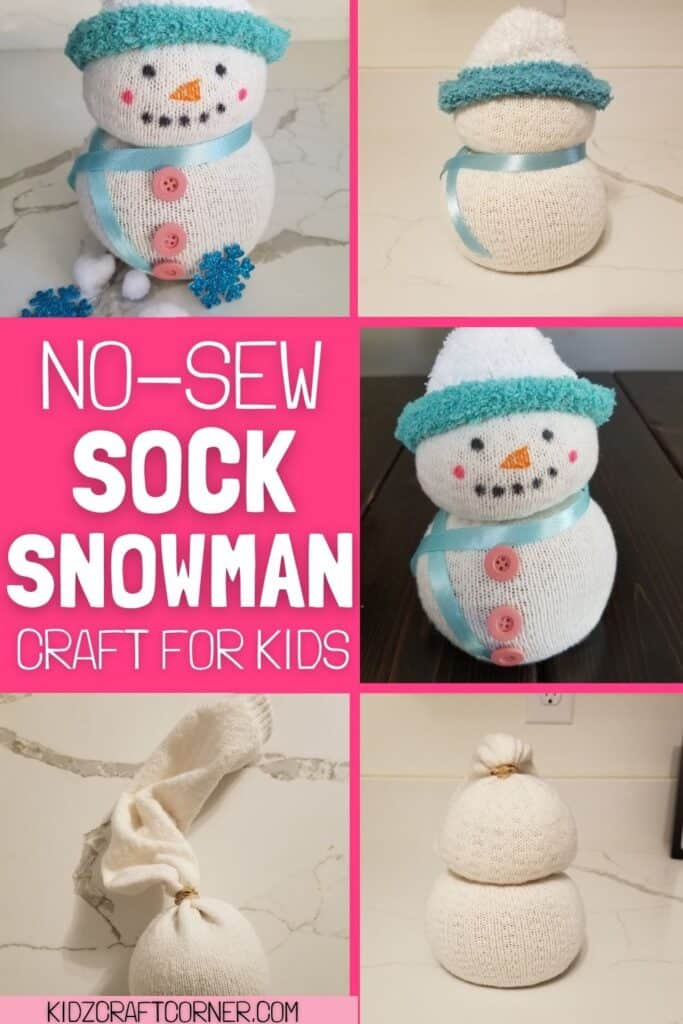
How to Make An Easy No-Sew Sock Snowman
This no-sew sock snowman was so much fun to do with my kiddo, and I’m sure you will have the same experience. Kids love crafting, and this project is ultra-fun for kids to do during the wintertime when it’s just too cold to go outside.
Or maybe you live somewhere where it doesn’t snow. Give this fun sock snowman a try, and let your child display it all winter long.
Another perk of this one is that clean-up is simple, with the exception of rice. Also, the supplies are minimal, but the results are so CUTE!
Notice: This post contains affiliate links. To learn more, read our Disclaimer Here.
This DIY sock snowman is very easy to make with minimal help from an adult. I recommend setting out all the supplies and letting your child try this project independently.
No-Sew Sock Snowman Craft Details:
Age Group: 4+ yrs
Difficulty: Medium
Time To Complete: 20 mins
If your child is on the younger side, they will need help with the rubber bands and holding the sock while they dump in the rice. If your child is over six, they will probably be able to handle this entire project independently.
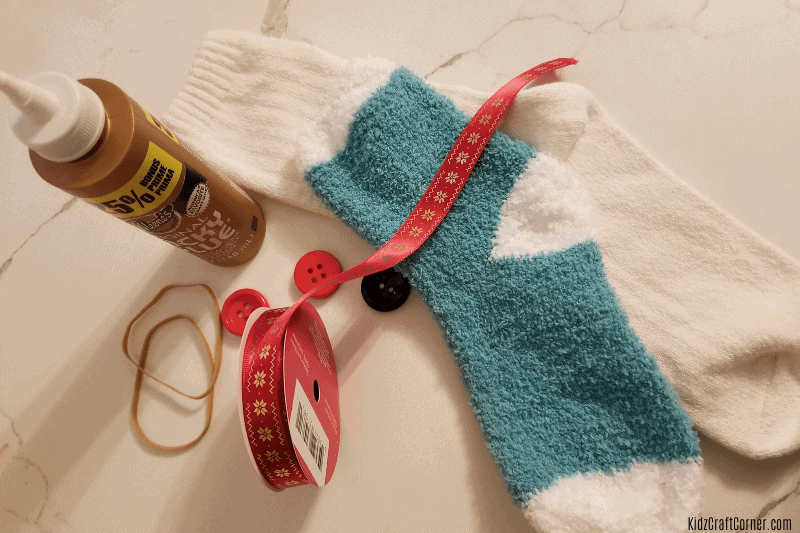
Supplies Needed for the Rice Sock Snowman
The supplies needed for this rice sock snowman will differ from person to person. Let your child choose what supplies they would like to use. For example, you can paint on the snowman’s face or use buttons or markers.
Here’s what you’ll need for this craft:
You can use any old socks you have lying around your home. The kids and I scavenged the house for old socks we no longer wore to make ours. Tube socks are the best, but really, any socks will work.
How to Make a Snowman Out of Socks
Step 1: Grab supplies for your sock snowman
As mentioned above, the craft supplies will vary depending on your home supplies. The best part about these DIY sock snowmen is that you can customize them however you want.
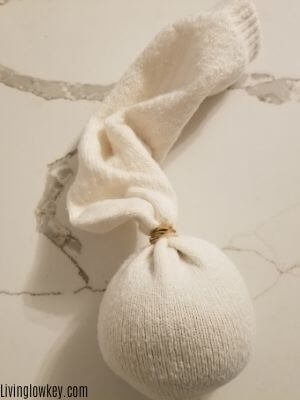
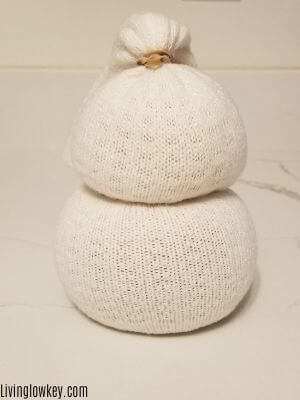
Step 2: Fill a sock with rice
Now, this will be the largest section of your snowman, so you will want to add a lot of rice to the bottom part of the sock. The more rice you put in, the sturdier your snowman will be.
Next, tie a rubber band around your sock so that rice can’t escape.
Related winter crafts:
- 100 Snowman Names (Good, Funny, Cute, & Holiday Themed)
- 21 Super Easy Snowman Crafts for Kids
- Festive Paper Roll Christmas Tree Craft for Kids
- Paper Roll Fall Tree: An Easy DIY Craft for Kids
Step 3: Add more rice to your sock snowman
Add more rice to your sock once the first rubber band is tied. Make sure to add less rice than the bottom and tie another rubber band once again.
My kids tried adding a third “snowball” to the top of their no-sew snowman, but they tipped over very easily. So, sticking with a two-layer sock snowman is best.
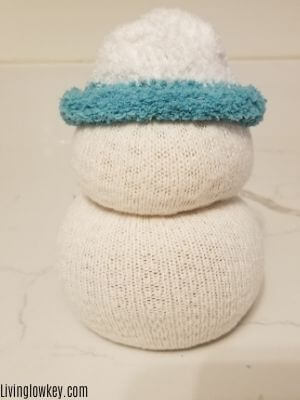
Step 4: Add a hat to your tube sock snowman
Once you add the second layer to your tube sock and tie it off, it’s time to add a hat. I used a different sock to make the hat because I wanted a little bit of color.
You can also take the top of the sock above where you tied the second rubber band, fold it over, and turn it into a hat.
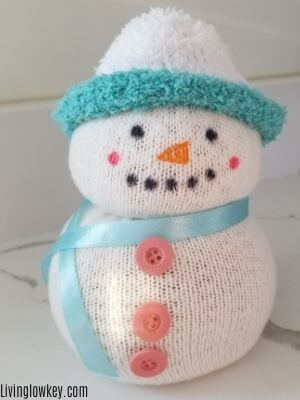
Step 5: It’s time to decorate your rice-filled sock snowman
Now it’s time to let your kids go crazy with decorating. I used paint and markers for the face. My kids used buttons! I would set all of the supplies out and let your kids go to town decorating as they please.
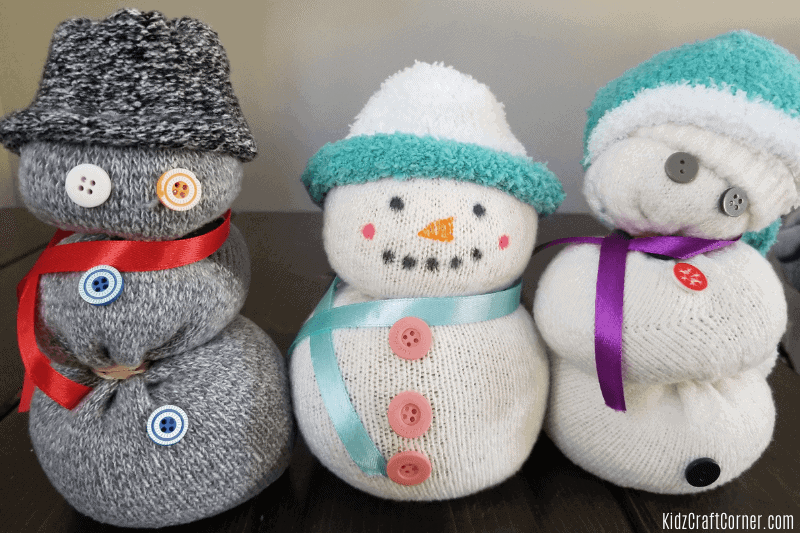
Sock Snowman Craft- Final Thoughts
These were the sock snowmen my kids and I made. You could try and add pipe cleaners for the arms as well. The sky is the limit!
If you enjoyed this craft, save it for later and follow us on Pinterest for more fun ideas.

Other fun crafts: