How to Make Sensory Bottles for Kids
Are you looking for a hands-on activity that helps your child self-regulate and control his or her emotions? Sensory bottles are the perfect way to provide interactive fun that stimulates their imaginations and senses – and they’re super easy to make!
Whether you have toddlers or school-aged children, making a sensory bottle is a great way to foster creativity and learn about colors, textures, and calm emotions.
Plus, it’s a fantastic way for even the youngest ones in your family to understand cause & effect.

Notice: This post contains affiliate links. To learn more, read our Disclaimer Here.
What are Calm-Down Sensory Bottles?
Calm-down sensory bottles, also known as relaxation bottles or glitter bottles, are clear plastic bottles or jars filled with liquid and various small objects such as glitter, beads, and sequins. They are designed to provide a calming and soothing sensory experience when shaken or turned upside down.
The concept behind these bottles is that the visual stimulation of watching the objects float and swirl in the liquid can help to reduce stress and anxiety and promote relaxation.
These calm-down sensory bottles can be easily made at home using simple materials like plastic bottles, water, glue, and glitter.
Materials for DIY Sensory Bottles
Below is a list of the supplies you need to make a glitter sensory bottle. You can follow the same steps to make various calm-down bottles.
Collect the items on the list below, and let’s start making this calming sensory jar!
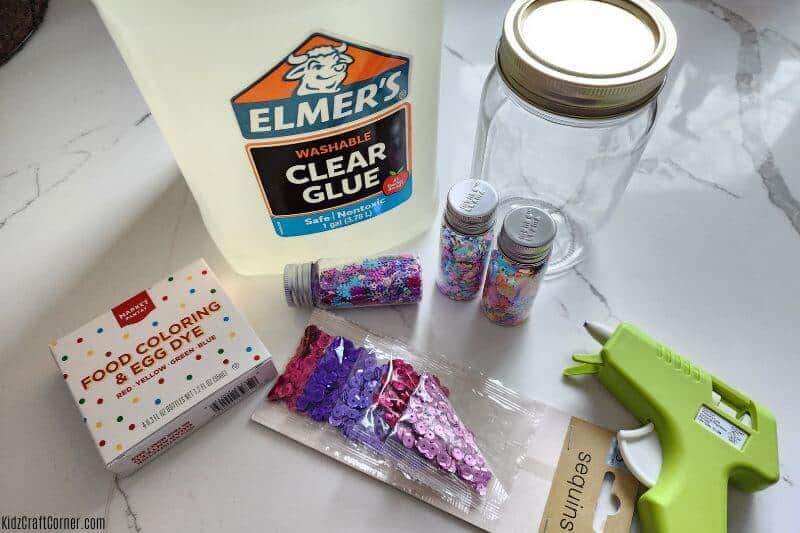
Supplies needed for your sensory bottle:
– Clear glue: Make sure it’s clear glue and not the white Elmer’s glue.
– Food coloring: A drop or two will turn your sensory jar into vibrant colors.
– Mason jar or bottle: You can use either a Mason jar or a plastic bottle to make your calming jar. If your child is 2-5 years old, use plastic. I highly recommend using this sensory bottle.
– Glitter: Glitter, as well as big sequins, are a must!
– Super glue or hot glue gun: Glue is optional. I’ve never had a bottle open on my kids, but it never hurts to glue the top shut.
How to Make a Sensory Bottle
Let’s get started on creating something special for your little one!
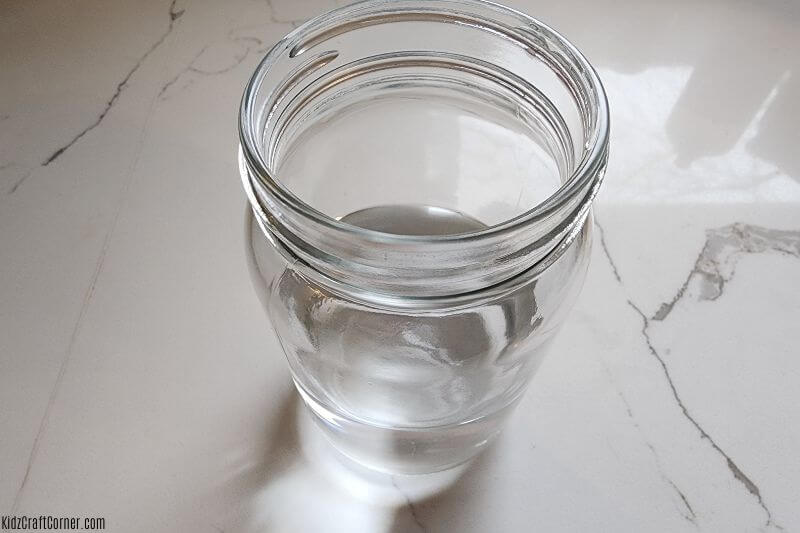
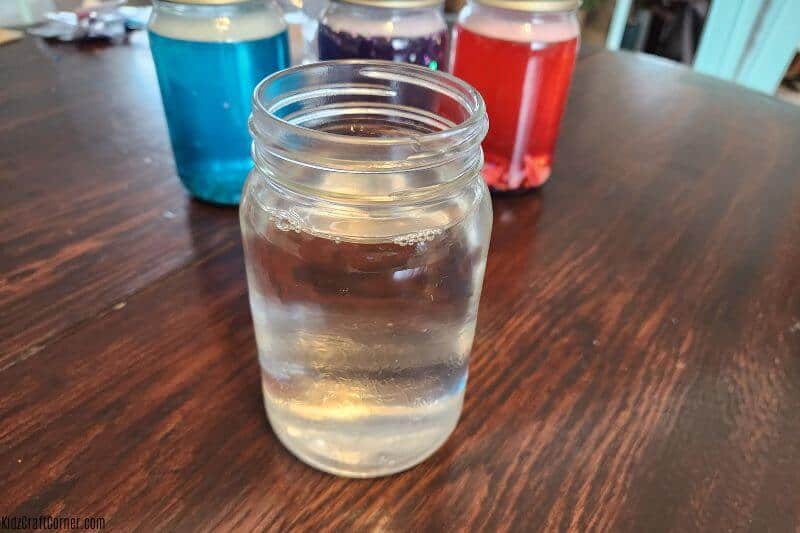
Step 1: Fill your sensory jar with water
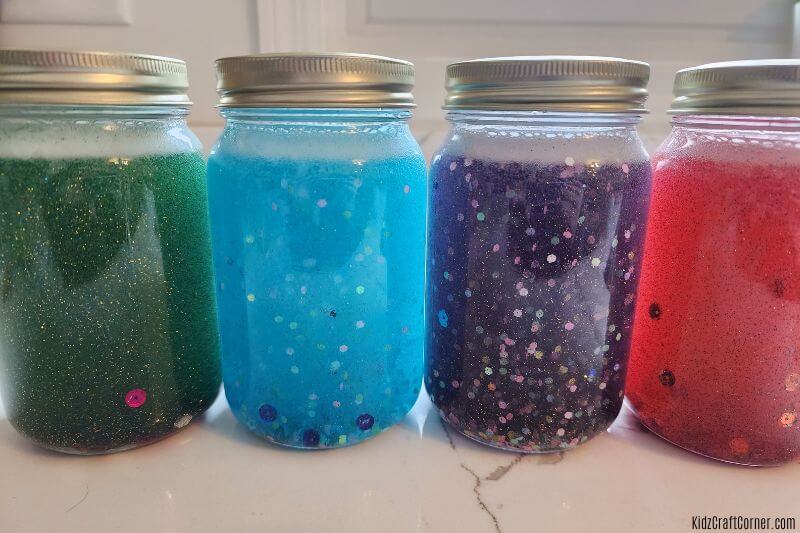
Start by filling your sensory jar (of choice) halfway up with warm water. We chose to make four different sensory jars at once so we could add different colors, glitter, and accessories.
Step 2: Fill sensory bottles with clear glue
Next, fill the remaining space in your jar or bottle with your clear glue. Leave a little room for glitter or any accessories you would like to add.
Step 3: Add food coloring of choice
Pick out what food coloring you would like to use. Then, drop 2-3 drops into your water/glue mixture.
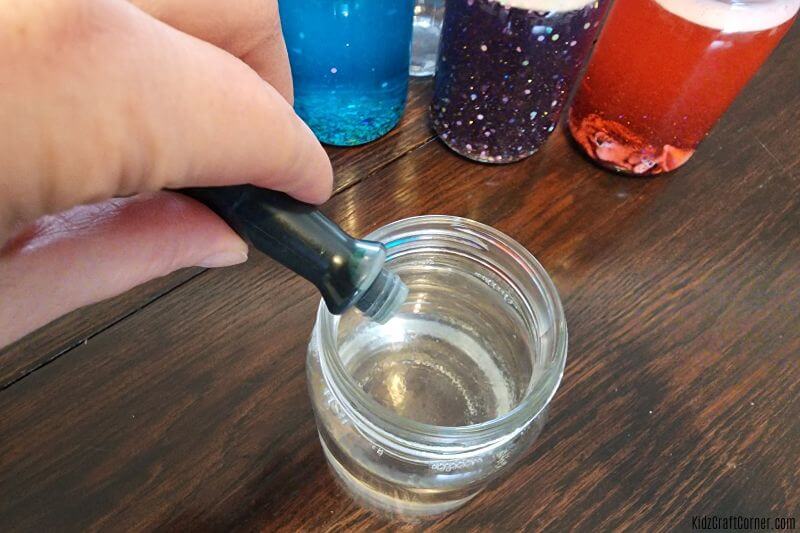
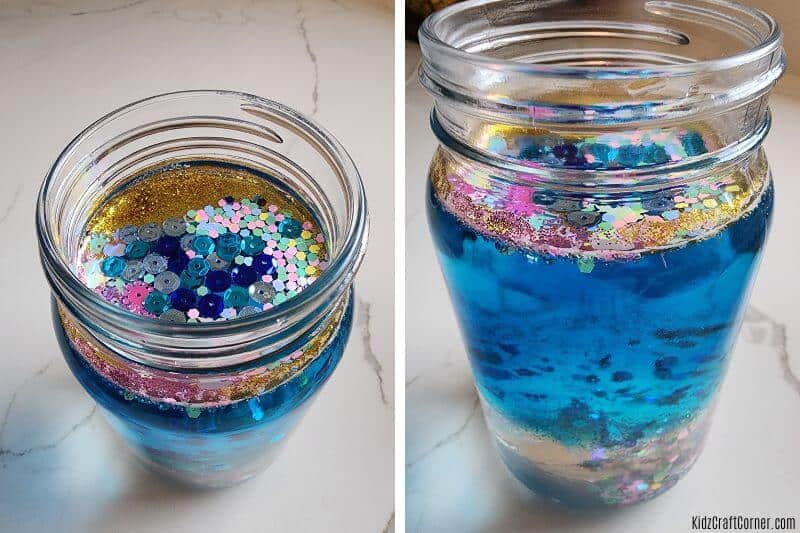
Step 4: Add glitter to your jar
Lastly, add glitter, sequins, and anything else you want to add to your jar.
My daughter added glitter and shells to her glittery blue sensory bottle. My son added toy dinosaurs and sharks to his.
Step 5: Finished sensory bottles
Now for the best part of the activity! Put on the top tightly and shake your sensory bottle as hard as you can. Watch as the glitter and sequins float through the glue.
If you choose to, you can glue on the lids as well. I haven’t ever had a top come up, but better safe than sorry.
Other fun craft ideas:
- Coffee Filter Butterfly Craft
- 17 Best Halloween Sensory Bins
- 21 Fun Winter Sensory Bin Ideas
- 22 Easy Homemade Playdough Recipes
Must-Read Sensory Books:
Keep the fun going with these fun sensory books. There are so many benefits to reading aloud to kids. It’s even been found that reading books to toddlers can help build their empathy, aiding in social-emotional development.
1. See, Touch, Feel: A First Sensory Book – This is a great first sensory book for kids!
2. Noisy Dinosaurs – Your child will love this interactive Dinosaur book. This dino book lets your child feel different textures and hear different dino sounds while enjoying a good read.
How to Make a Sensory Bottle – Summary
Making homemade sensory bottles can provide many different opportunities for stress relief, concentration improvement, and creative play, all of which parents and children can benefit from!
The combinations are endless, whether it’s a calming bedtime bottle, calming jar, or tactile activity bottle!
Crafting and creating with your kids is always a great way to spend quality time together.
If you enjoyed this craft, save it for later and follow us on Pinterest for more fun craft ideas.

Other fun craft ideas: