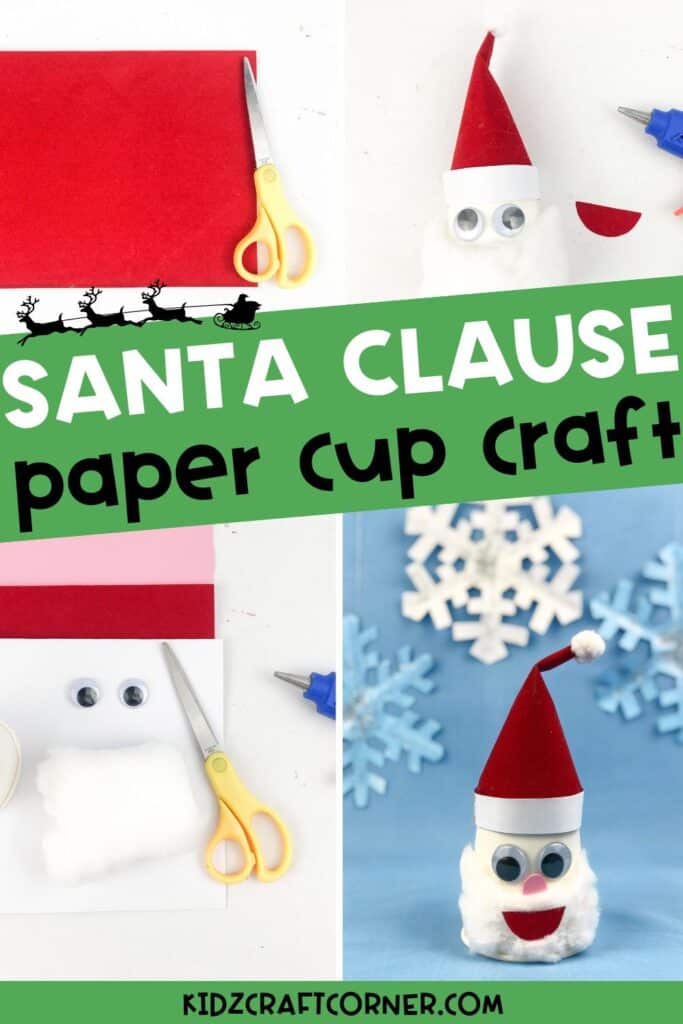
Fun Paper Cup Santa Claus Craft For Kids
With Christmas around the corner, I felt the need to develop an easy Christmas craft the whole family could join in on.
Thankfully, this adorable paper cup Santa Claus craft hit the spot. This craft is simple enough for kids of all ages to complete and will put a smile on everyone’s face. So join us as we go through the steps of making our own Santa Claus masterpiece.
Notice: This post contains affiliate links. To learn more, read our Disclaimer Here.
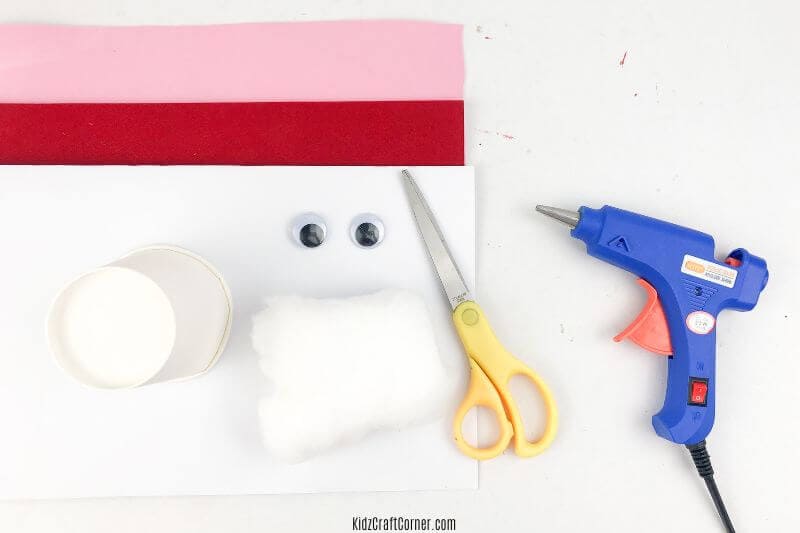
Materials for Your Paper Cup Santa Craft
Are you ready to make this fun Santa craft? Grab the needed craft supplies, and let’s recreate this fun Santa Claus made from a paper cup.
Collect the items on the list, and let’s get started:
– Paper cups: A white paper cup works best for this Santa craft!
– Cotton balls: If you have a few cotton balls floating around your bathroom cupboards, they work perfectly for this craft.
– White paper: Any white paper will work for this Santa craft.
– Pink foam sheet: We love this rainbow foam paper. We use it for so many different crafts.
– Red felt paper: Red paper is a great substitute if you don’t have red felt on hand.
– Glue gun or Elmer glue: Depending on your child’s age, choose the appreciate glue for them.
– Scissors: Always give your child a chance to cut out the pieces themselves with child-friendly scissors. However, they might need help cutting thicker material like felt.
– Googly Eyes: Any googly eyes work. Or you can draw them with markers.
Tip: When working on this paper cup craft, feel free to alter the craft as needed, depending on your child’s age. My 9-year-old likes using a hot glue gun for gluing on the pieces. However, I have my 5-year-old stick to using Elmer’s glue and glue sticks.
Other fun Christmas crafts you MUST try:
- 20 Handmade Christmas Ornaments Kids Can Make
- 20 Easy Elf Crafts for Kids To Make This Christmas
- 21 Cute Christmas Handprint Crafts
How to Make Santa Claus With a Paper Cup
Are you ready to make this fun Santa Claus craft for kids? Follow along below as we’ll provide step-by-step instructions you need for this paper cup, Santa. Let’s get started on this crafty project!
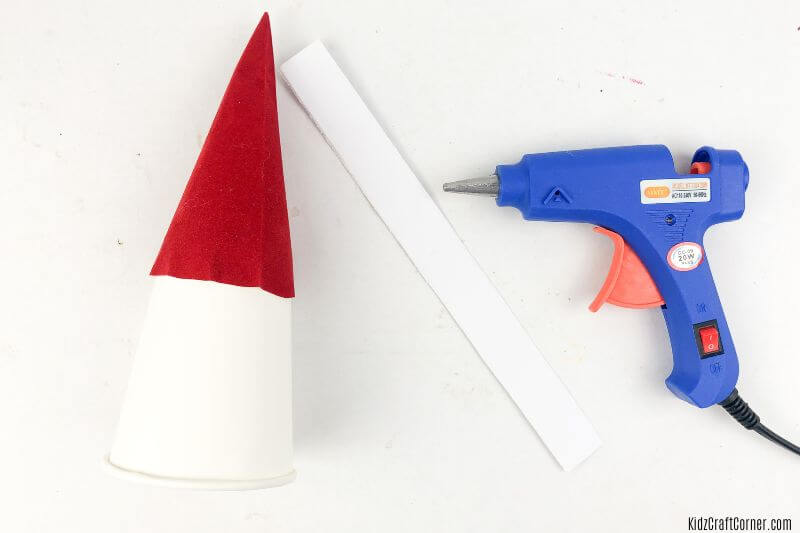
Step 1. Create Your Santa Claus Hat
Carefully cut one-half circle, a triangular shape, from the red felt paper, and make a cone (triangle). Its size should be proportioned to the size of your paper cup.
Then, glue the cone with a glue gun or tacky glue. Set aside the cone to dry.

Step 2. Attach Santa’s Hat
Attach the cone to the top of the paper cup using the glue of your choice. My older daughter used a glue gun, while my younger son used Elmer’s glue.

Step 3. Finish His Hat
Cut one long rectangle from the white paper and glue it around the lower part of the red cone, aka Santa Claus hat. You’ll also want to glue a cotton ball to the tip of his hat!
Step 4. Add Santa’s Beard
Now for the fun part! Your paper cup is going to transform into Santa. Start by pulling apart cotton balls and stretching them out to form one large beard. Then glue the cotton to the paper cup.
Or you can let your child independently glue on multiple cotton balls, whatever they prefer.
Then add googly eyes right underneath the edge of Santa’s hat. I love these adhesive googly eyes as they work the best. Lastly, cut out a half-moon from the red felt for the paper cup Santa’s smile.
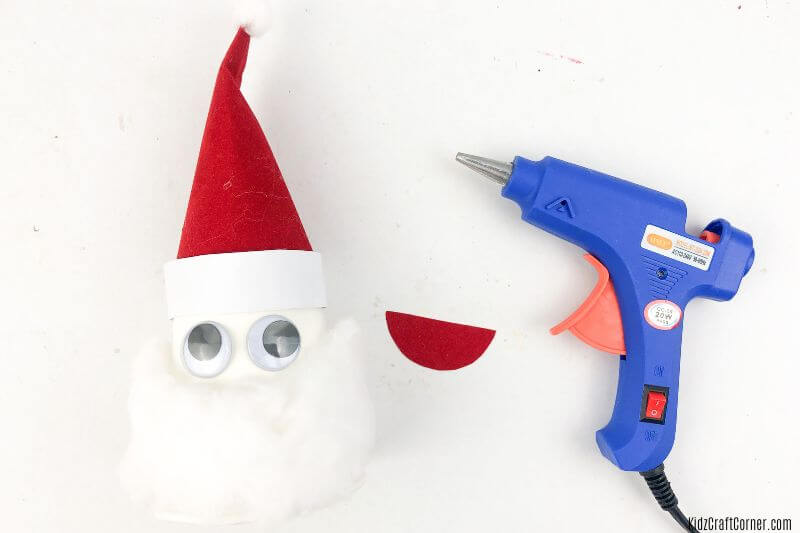
Step 5. Finish Your Paper Cup Santa Claus
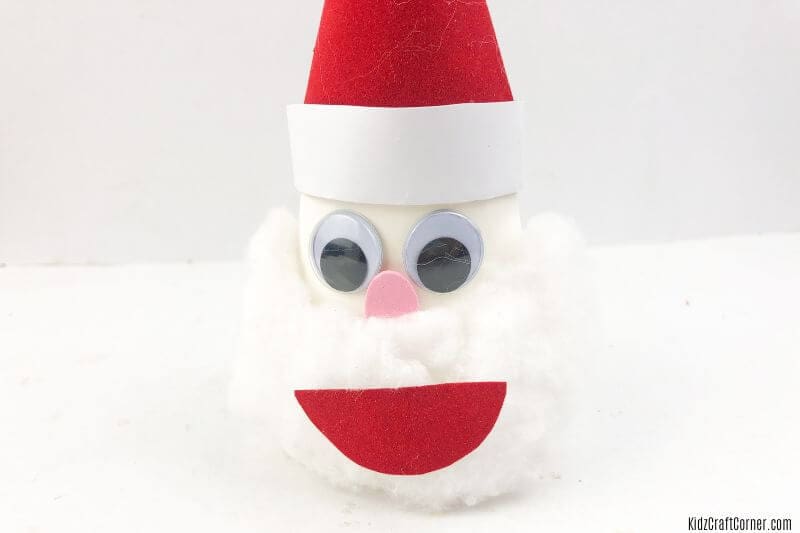
We are almost finished. Take the half circle you cut and glue it to his cotton beard.
Lastly, cut a tiny arc shape from the pink foam sheet and attach it right below the googly eyes as his nose!
Now you have your Paper Cup Santa Craft. You did it!
Must-Read Christmas Books:
Keep the fun going with these must-read winter books. There are so many benefits to reading aloud to kids. It’s even been found that reading books to toddlers can help build their empathy, aiding in social-emotional development.
Our favorite Christmas reads:
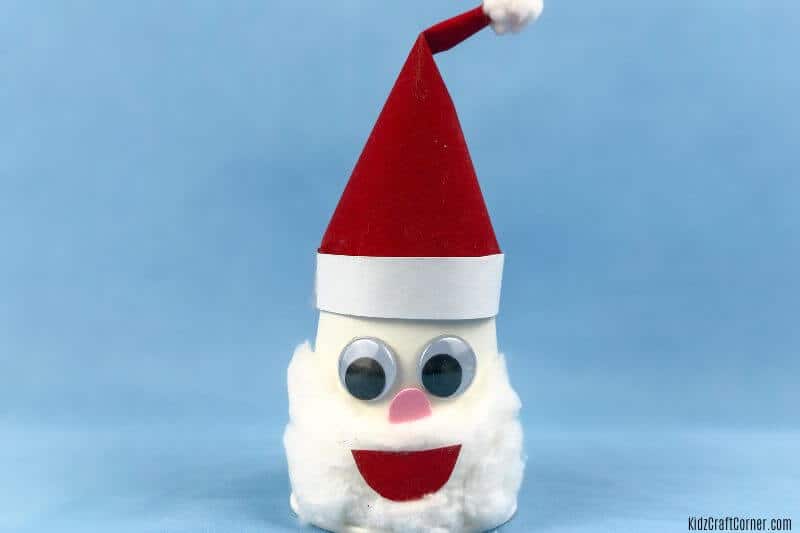
Paper Cup Santa Claus Craft – Summary
I hope you had a blast creating your own paper cup Santa craft! With so many different Santa Clause crafts, this one is easy, and everyone in the family or classroom can participate.
Feel free to share how your Santa paper cup turned out in the comments below.
For more creative kid crafts and activities, follow us on Pinterest!
Must-Try Christmas crafts:
- 20 Printable Christmas Crafts Kids Can Make
- 21 Cute Handprint Crafts for Kids
- 27 Easy Christmas Tree Crafts
- How To Make A Salt Dough Handprint Ornament For Your Tree