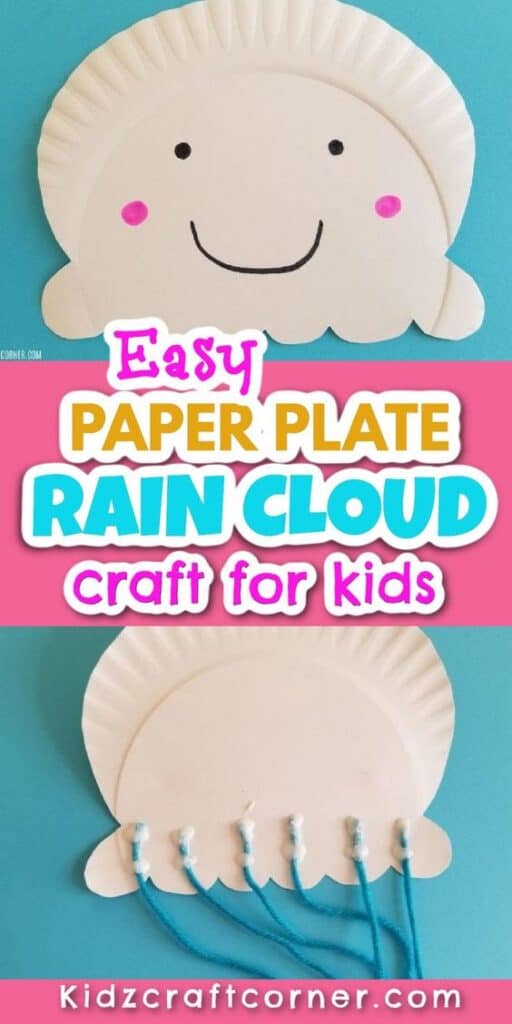
Easy Rain Cloud Craft (Perfect For A Rainy Day)
Perfect Cloud Craft for Preschoolers and Beyond
One of the reasons I love doing crafts with my kids is that it’s a great chance to learn new things!
This weather theme craft is perfect for teaching preschoolers about rain clouds and how they work. Plus, these rain clouds are cute and fun to make!
Your kids will love these, and they get to create clouds with a little personality.

Notice: This post contains affiliate links. To learn more, read our Disclaimer Here.
Rain Cloud Weather Theme Craft Details:
Age Group: 2+ yrs
Difficulty: Super Easy
Time To Complete: 15 min
You’ll love this simple rain cloud craft. My kids love it, and they have different clouds with all sorts of facial expressions hanging in their rooms.
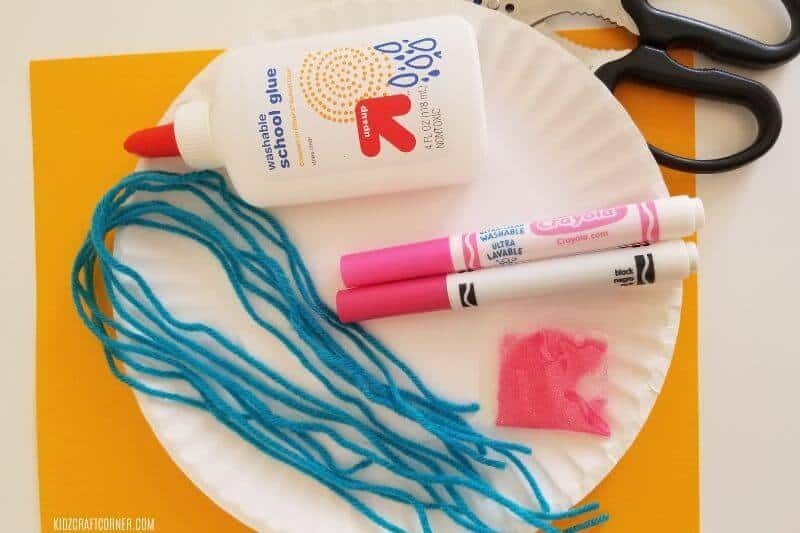
Supplies Needed for Weather Theme Rain Cloud Craft
Before we dive into the step-by-step instructions for creating this adorable DIY cloud mobile craft, let’s take a look at the supplies you’ll need for your cloud craft:
Here’s what you’ll need to make your very own rain clouds:
How to Get Started With Your Rain Cloud Craft
I loved using a paper plate for this project. We had quite a few in our cupboard from our last camping trip that we decided to use up. However, feel free to use whatever you would like.
Kids enjoy working with new objects, and paper plates are always a hit at our house. They always turn into frisbees at some point.
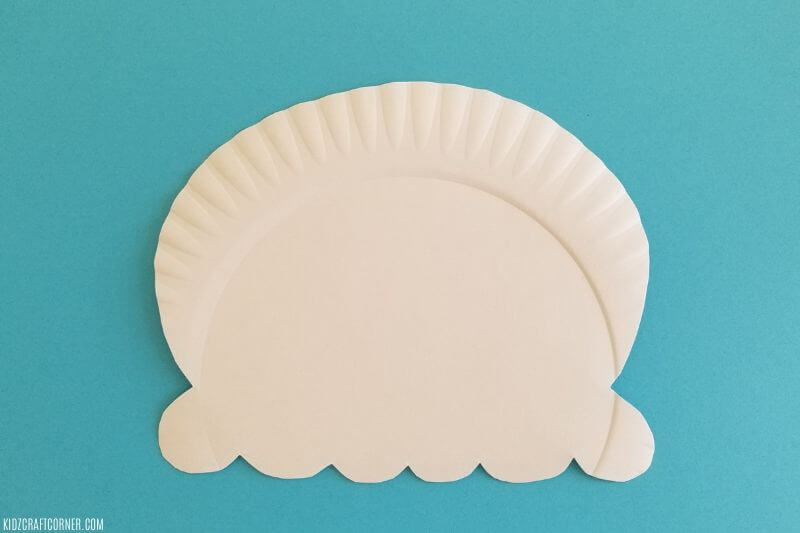
Step 1: Trace and cut out your cloud craft
If you have great cutting skills, go ahead and cut out your cloud. If not, grab a pencil, trace out the cloud, and have your kid cut it out.
I traced out the cloud for my six-year-old and had her cut it out herself. With my three-year-old, I cut out the cloud for him and then gave him all the pieces so he could assemble them himself.
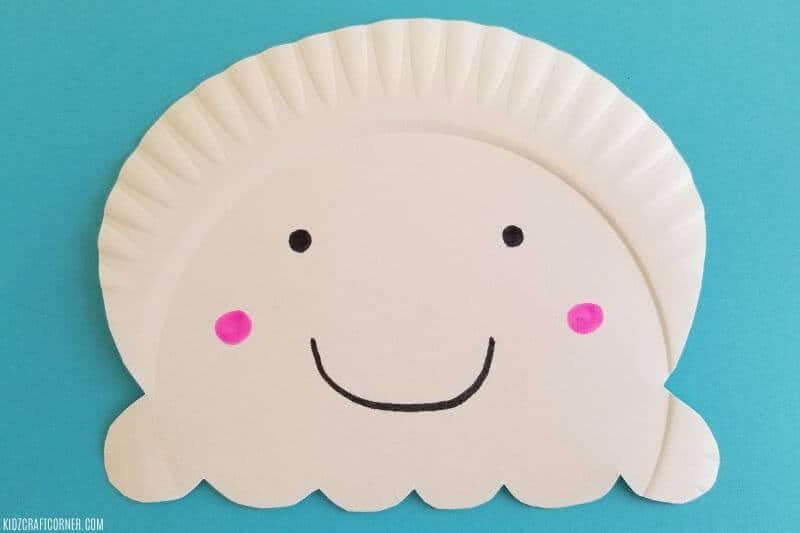
Step 2: Add a face to your paper plate cloud craft
Once your cloud is cut out, add a face, some googly eyes, color in some hair, whatever you would like.
Let your kids get creative and personalize each of their clouds. You can use markers, buttons, crayons, colored pencils, you name it!
Related craft: Fun Rainbow Paper Plate Craft for Kids
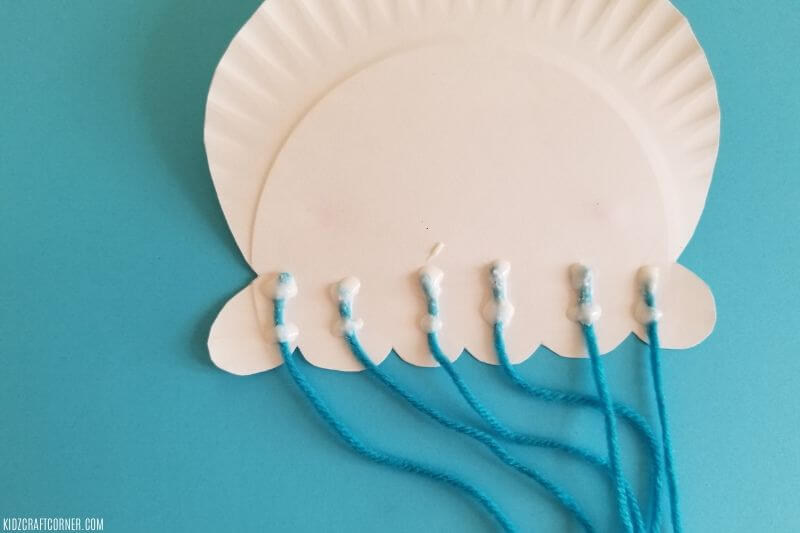
Step 3: Attach yarn- AKA the rain
There are several ways to attach each piece of yarn to your cloud. We just flipped over your cloud and used Elmer’s glue to glue on each piece of string.
I’m sure fabric glue would have worked better. If you have a paper puncher, you could punch out some holes and tie on the string. Whatever you have at home, make it work for you.
If you don’t have yarn lying around your home, you can also use streamers or cut-up strips of paper. Get creative!
(Update) Our Elmer’s glue held up pretty well. To this day, the string hasn’t fallen off.
Finished rainy day craft for toddlers
Here is the delightful craft project we completed on this rainy day! Doesn’t it look adorable and charming with its colorful details and creative design?
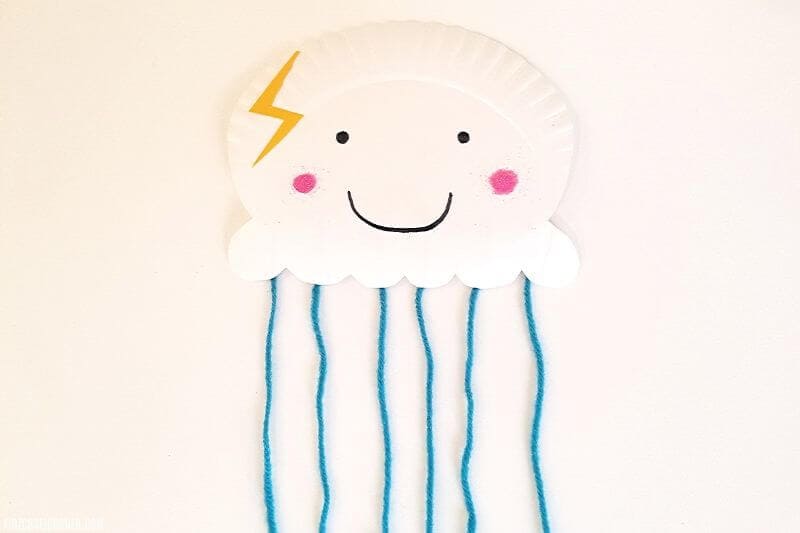
You can see I added a little lighting bolt accessory. You could also attach a string to the top to hang it up in your home.
If you have beads, you could also add beads to the yarn. This is a great way to extend this project, as kids love adding beads to any project.

Rain Cloud Craft for Preschoolers- Summary
This rainy cloud craft provides a fun and exciting activity for toddlers and kids alike. It helps develop fine motor skills and encourages children to explore the world around them.
As a bonus, you can even help teach your kids all the different types of rain that sometimes fall from the clouds!
Undoubtedly, you and your child will have fun making this DIY rain cloud. So why not gather simple supplies and prepare to make artistic memories? Get out there and enjoy making this rainy cloud craft!
If you enjoyed this rain cloud craft, save it, and follow us on Pinterest for more kid’s craft ideas!
Other fun crafts: